
First-run setup
Complete the Launchpad setup wizard: create the first account, which becomes the administrator, and optionally configure Mailgun or SMTP for invitations and password resets.
The first time you open Launchpad, it funnels you to a one-time setup wizard. The first account you create becomes the administrator. After that, self-service signup is closed by default; additional users join by invitation only.
Create the admin account
Open your Launchpad URL (e.g. http://localhost:3000). You'll see the setup wizard.
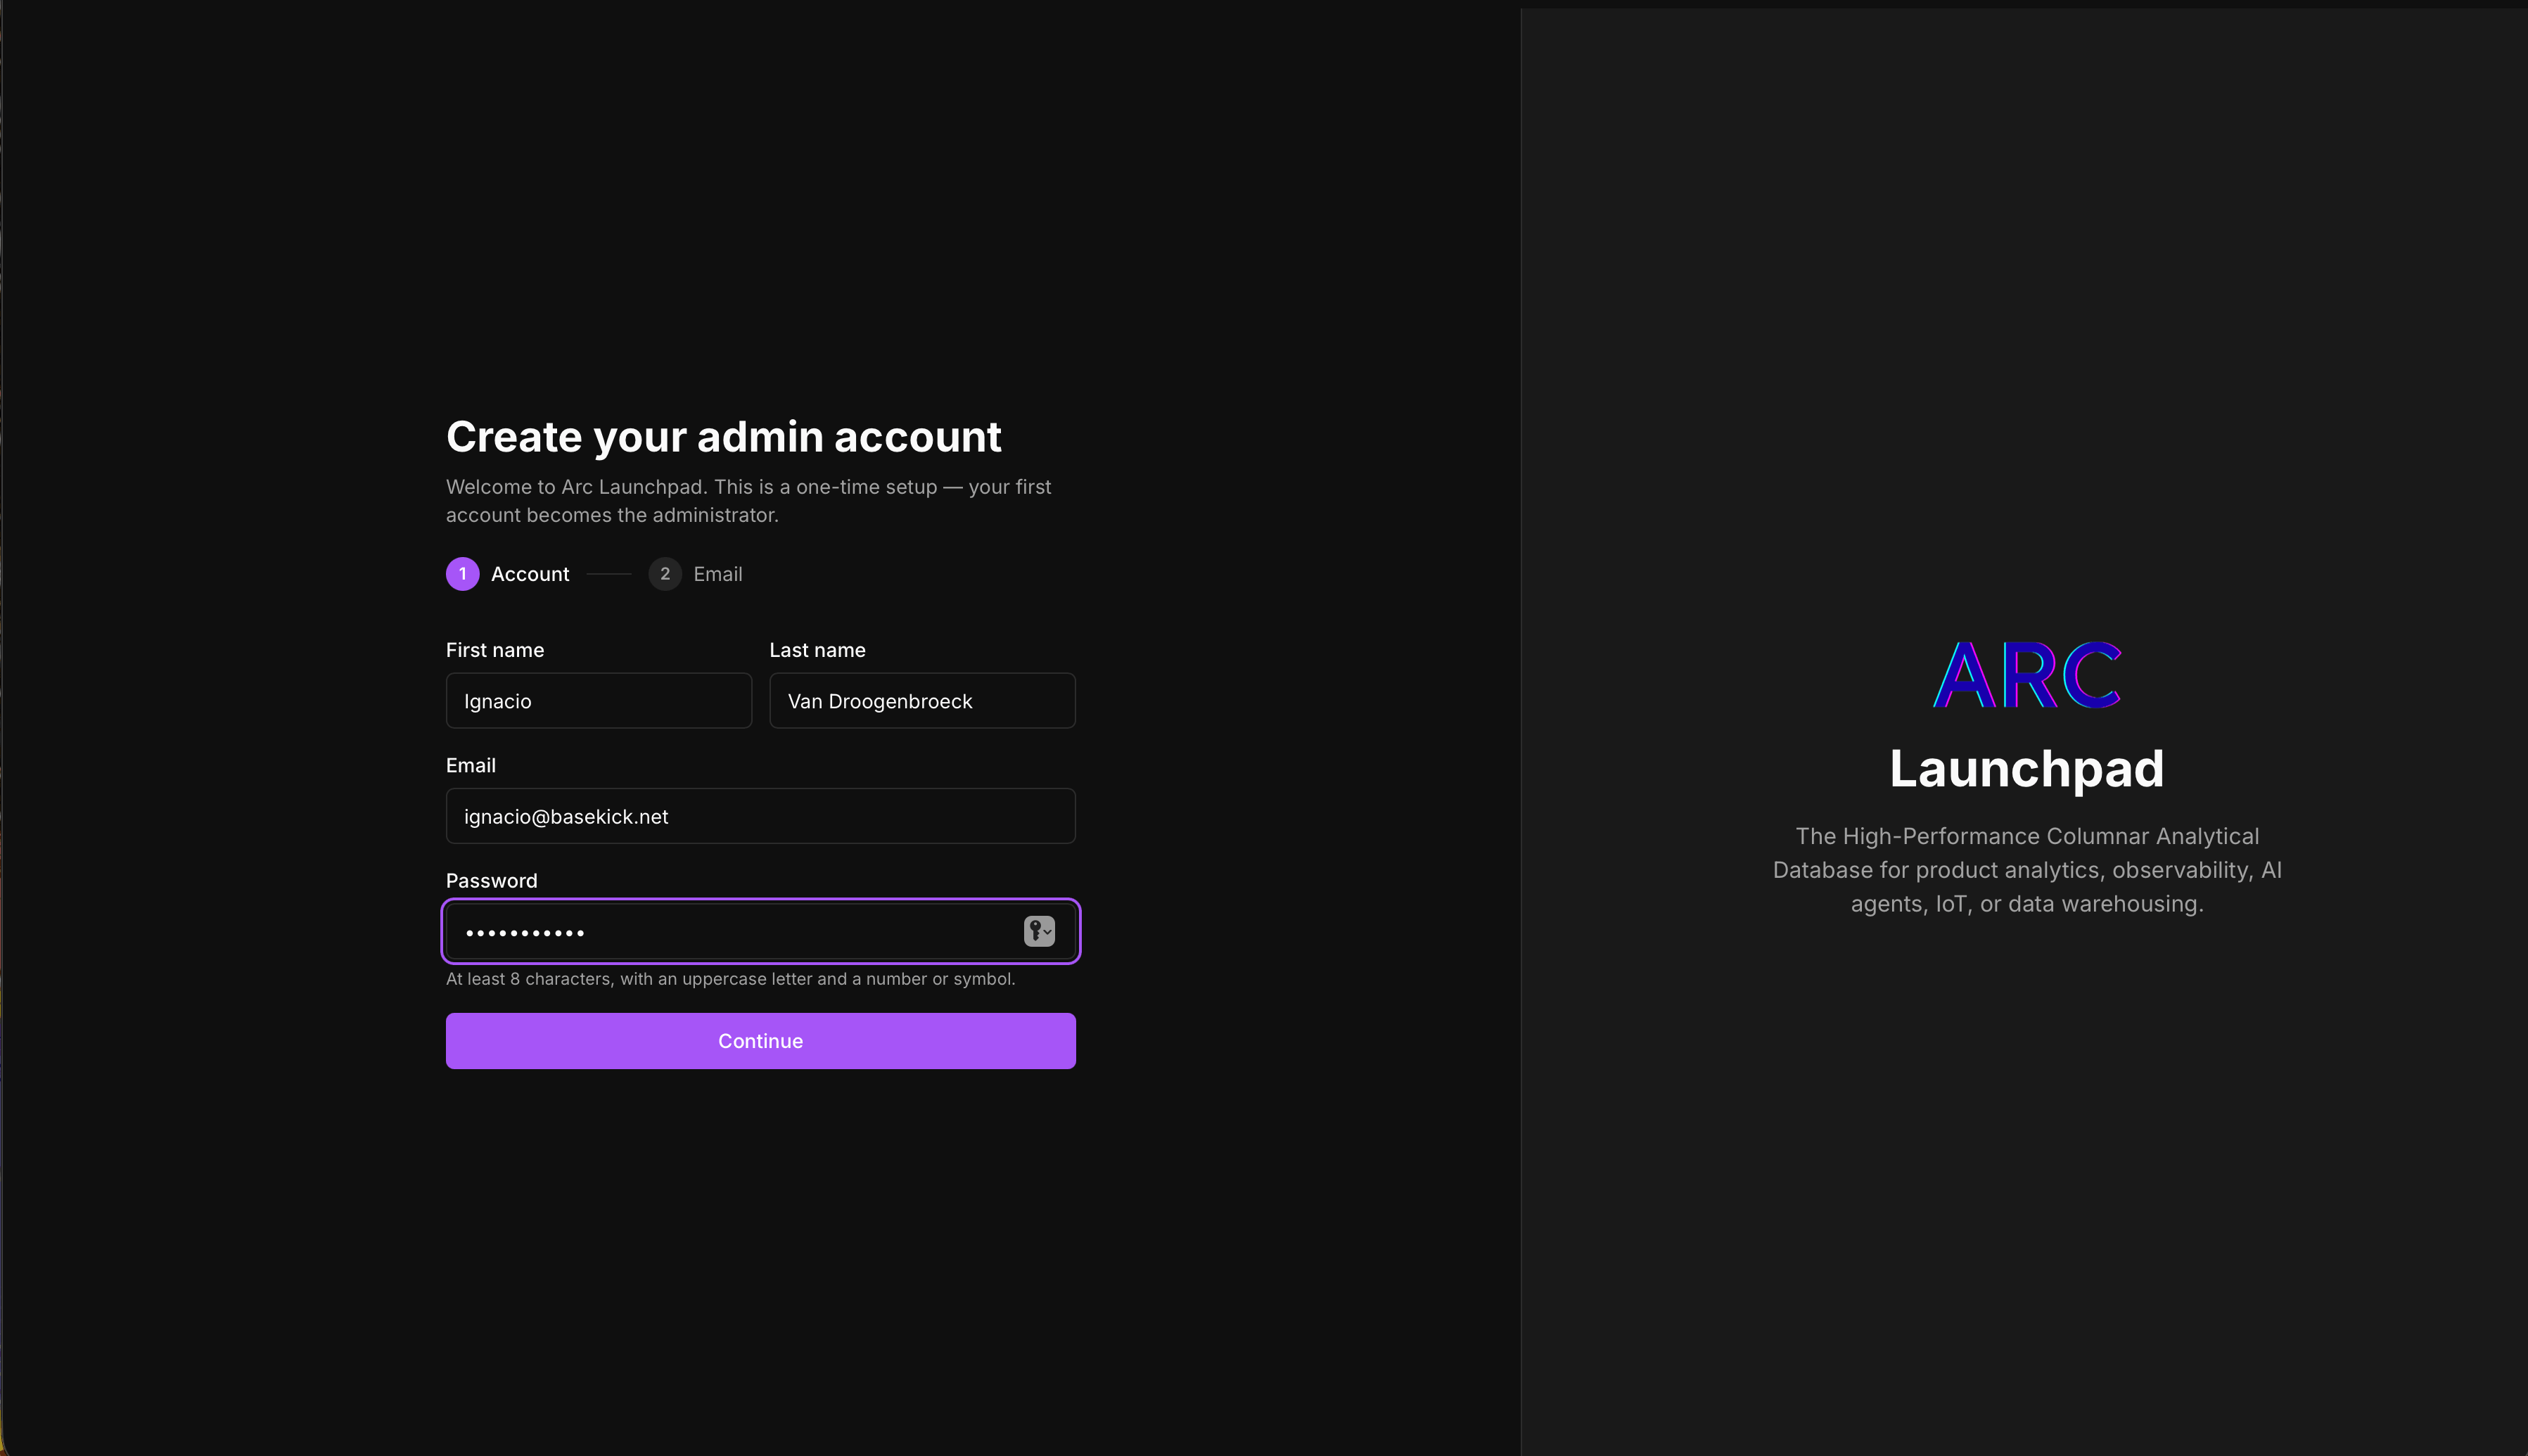
Fill in:
- First name / Last name
- Email: becomes your login and the owner of the first organization
- Password: 8 to 128 characters, with an uppercase letter and a number or symbol
Click Continue.
Configure email (optional)
The second step lets you configure an email provider for invitations, verification, and password resets.
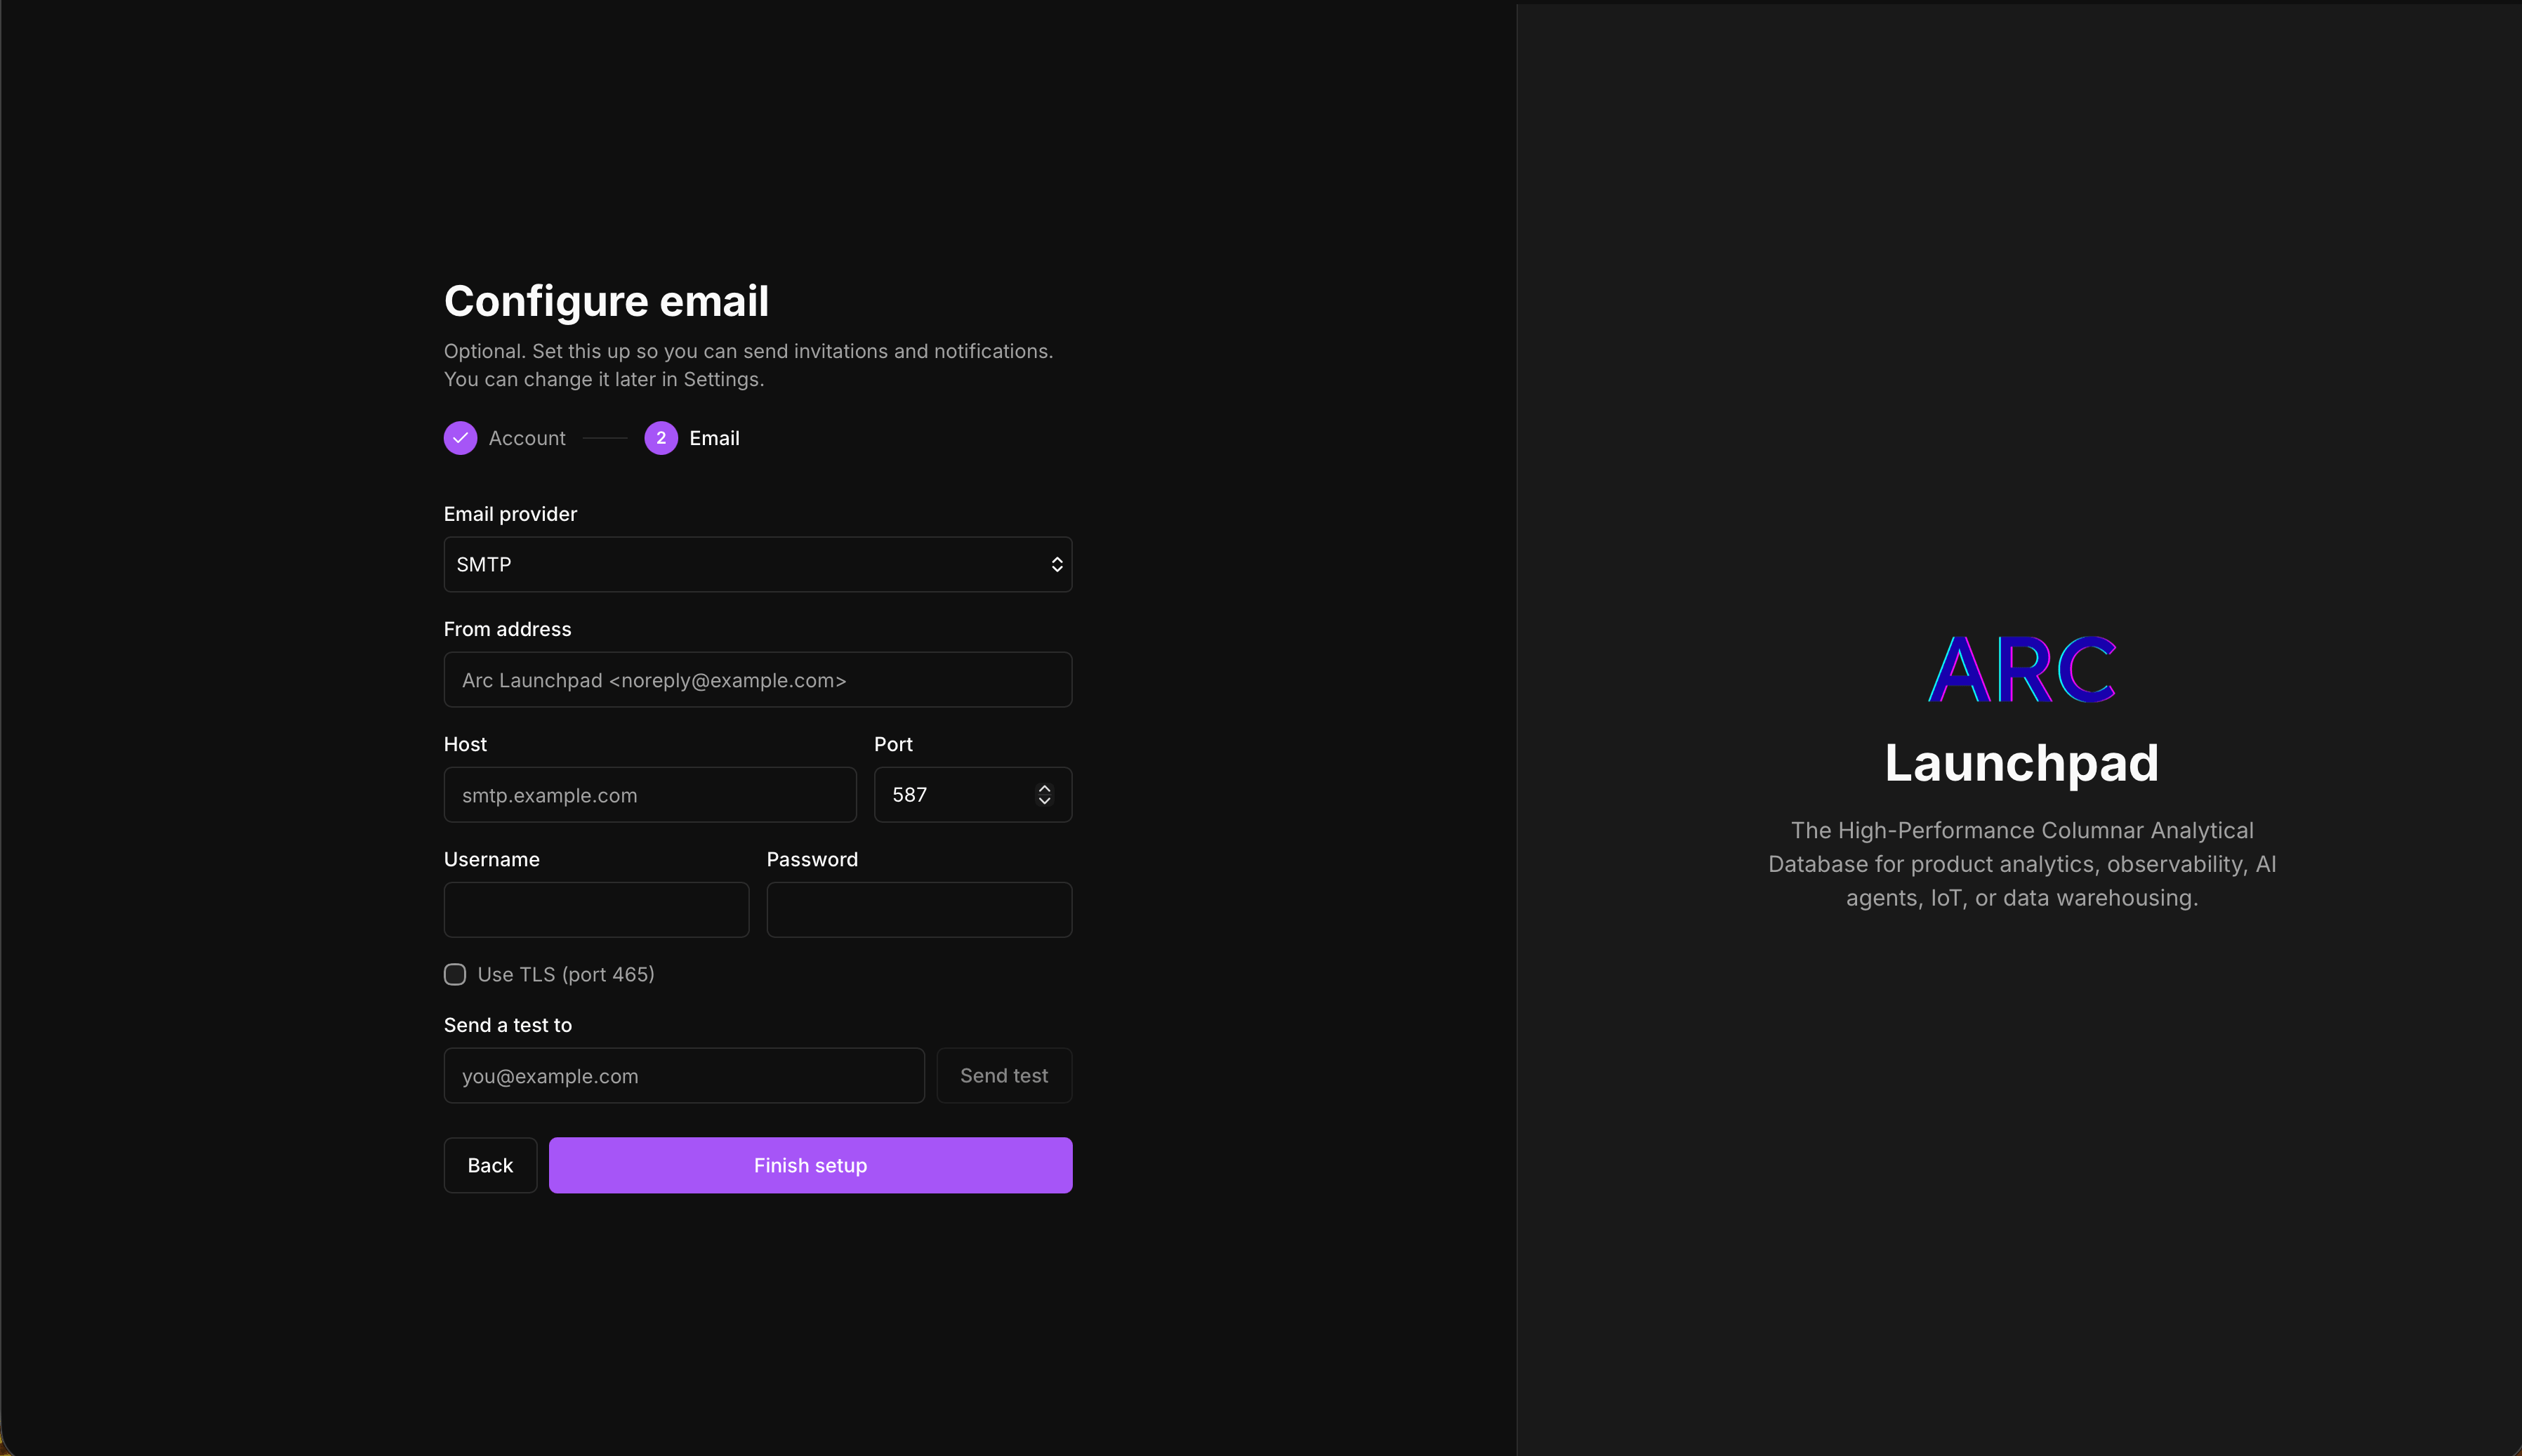
Choose None, SMTP, or Mailgun:
- None: email is skipped. Invitation and reset links are printed to the server console instead of being sent. This is fine for a single-admin or evaluation deployment.
- SMTP: provide the from address, host, port, TLS setting, and (optionally) username and password.
- Mailgun: provide the from address, sending domain, API key, and the API base URL for your region.
Either provider lets you send a test message before committing, so you can confirm delivery works.
Email configuration is best-effort and never blocks admin creation; you can set or change it later under Settings, in the Email section.
Click Finish setup to create your admin account. You'll be signed in and dropped on the dashboard.
Setup is one-time
Once an account exists, the setup wizard is permanently closed and redirects to the login page. There's no way to re-run it against an existing database.
Next
Now connect your first Arc server: Connecting to Arc.
Installation
Install Arc Launchpad with Docker Compose alongside Arc, standalone Docker, the Helm chart, or from source, setting LAUNCHPAD_JWT_SECRET and LAUNCHPAD_BASE_URL.
Connecting to Arc
Register an Arc server in Launchpad: supply the Arc HTTP API URL and an admin token, and allow private endpoints when Arc runs on a Docker network or private subnet.